How To Add Discounts To Shopify
What are Discounts On Shopify?
Offering discounts can be a powerful marketing strategy for your Shopify store. To offer discounts, you can create discount codes, set up automatic discounts, or set sale prices for individual products.
You can create codes for a dollar value discount, a percentage discount, or a free shipping discount. Customers can enter discount codes online at checkout, or in person if you’re using Shopify POS.
You can update and manage existing discounts from the Discounts page in Shopify. Before you update a discount, check if another staff might also be making changes to the same discount.
Let’s have a look at the how to add Discounts step-by-step.
First, you have to log in or signup for your Shopify partner account.
Then Open your Shopify store admin panel.
Click on Discounts which is displayed on the left sidebar.
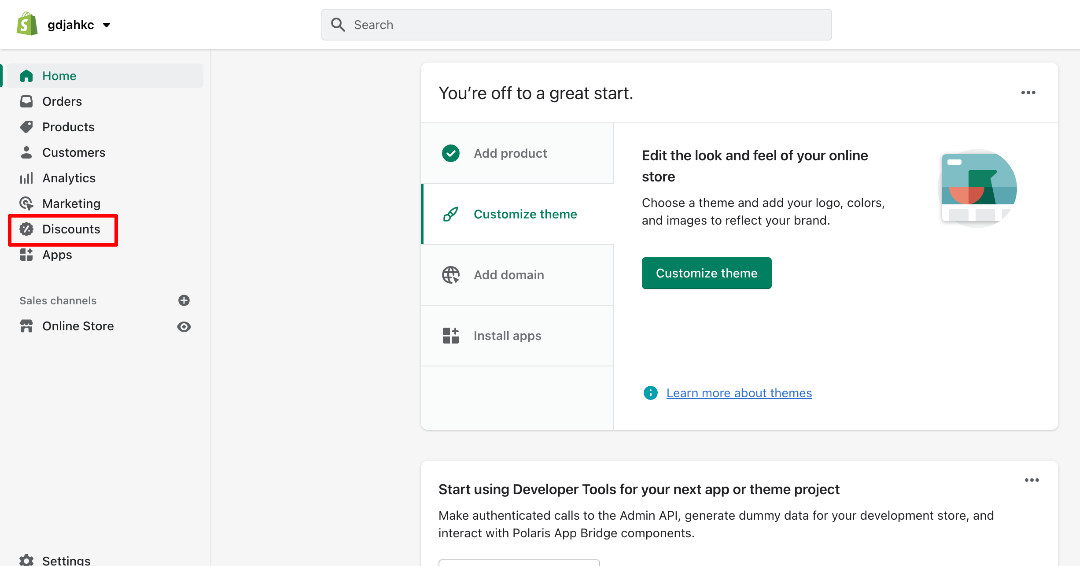
Did you click on the Discount button?
Yes!!!
That’s great
You will see the display, which displays the “Create Discount” button.
Click on This button.
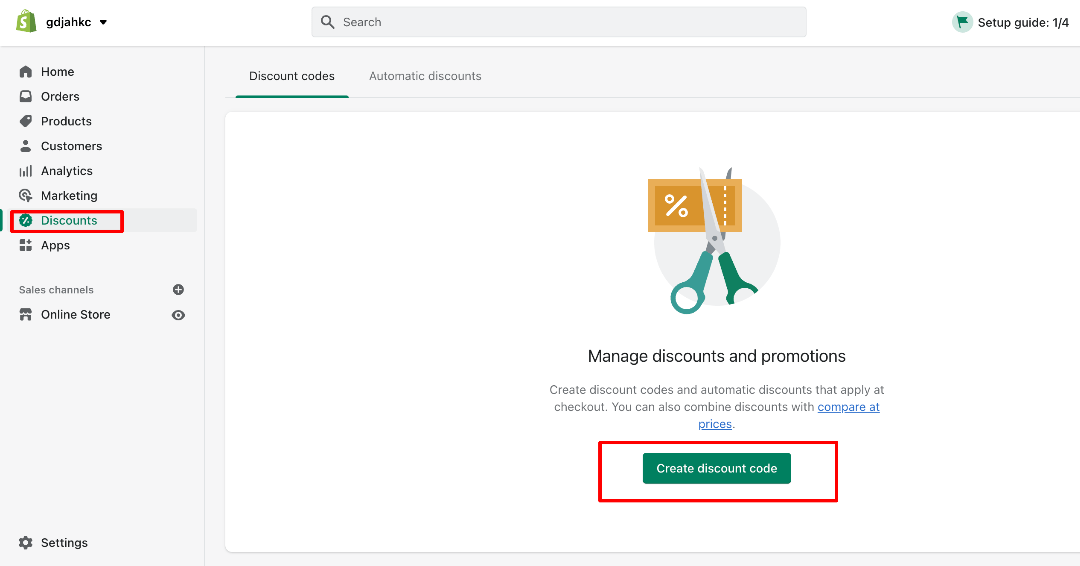
Ohh, You’re so smart and intelligent.
You’ve clicked on that button.
After that, you’ve to fill in some basic information such as the discount code(coupon name).
You can also generate the discount code by clicking on “generate code”, displayed on the right top of the text box.
But the major thing is that there are four types of discounts.
1. Percentage
2. Fixed Amount
3. Free Shipping
4. Buy X Get Y
Stay tuned with the reading; We’ll explain you in detail with the output.
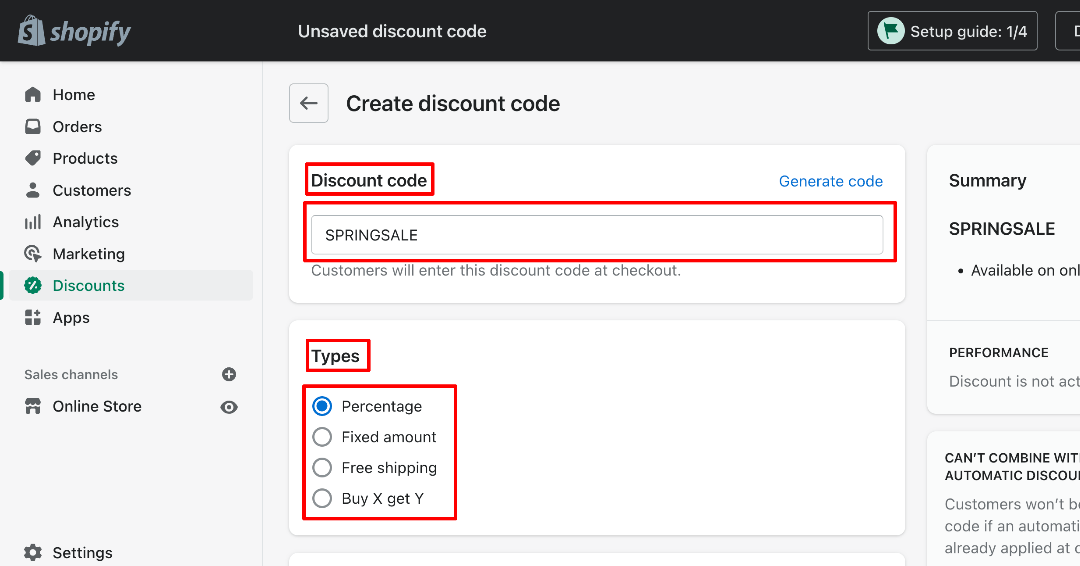
Let’s create the Discount code using multiple types of discounts.
Firstly we take a “percentage” type of discount.
You need to fill value- How much discount you’ve to give on Specific products, All products, or specific collections.
After that, you’ve to fill the minimum or maximum order value in the text box, which is the price.
Then click on the “Save” button.
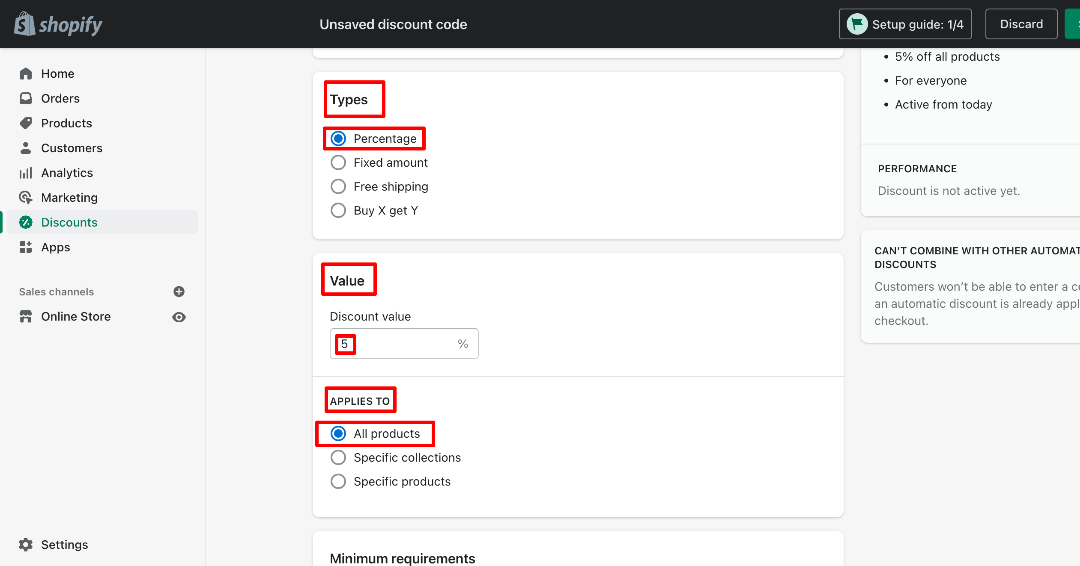
Let’s check the discount code.
Add the product to the cart.
Go on the cart page.
Apply the discount code that you create.
Show whether the discount has been applied or not.
For example, I’ve created the Discount code “SPRINGSALE”.
I’ve applied for the product.
Discounts will be displayed below the image.
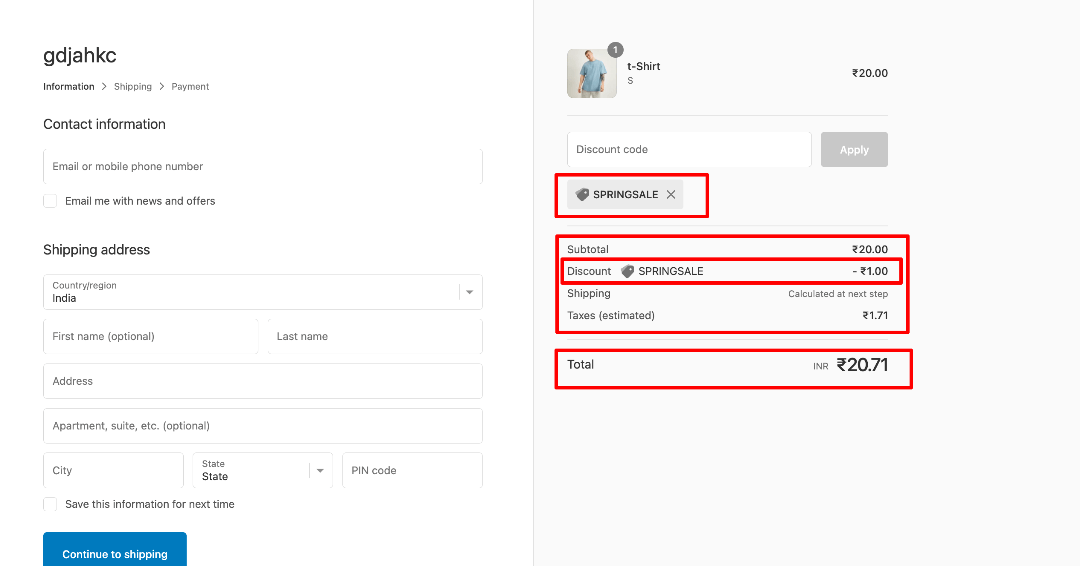
Let’s take a 2nd type for the demo, how to create a “Fixed Amount” Discount type.
Firstly, select the discount type “Fixed Amount”.
After that, you’ve to fill the value in the text box- fix the amount.
Moreover, you can see the “Applies To” section.
You can see three options in it. Whatever you select from that 3.
If you select the Specific products or collections, you can see the text box with the “Browse” button below.
Oh, You’ve already clicked on the “Browse” button.
You can select the specific products or specific collections from your store.
Oh, That’s great. You have selected the Specific collections or products.
Click on the “Save” button.
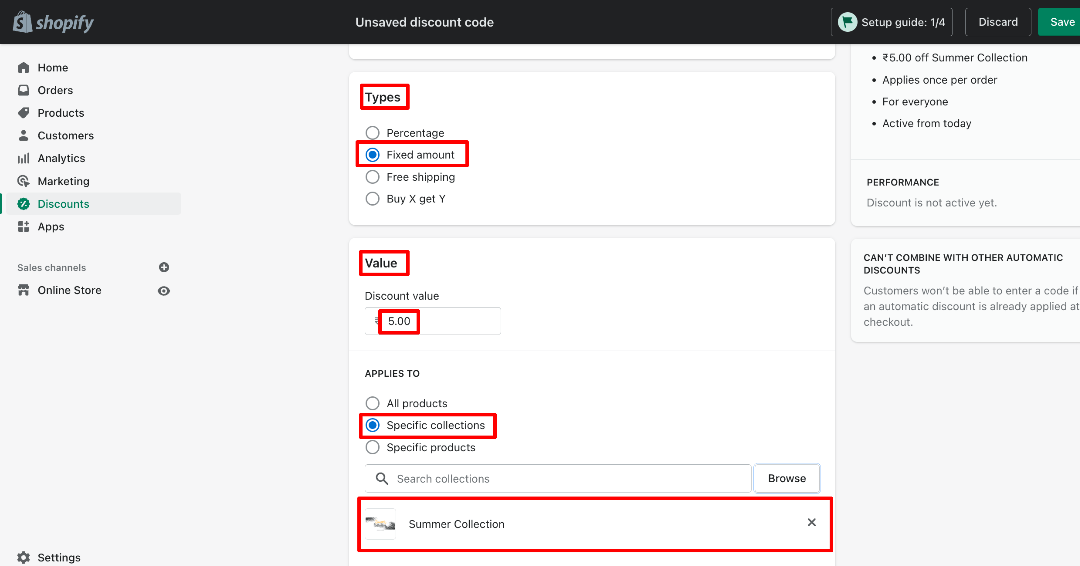
Let’s have a look at the recently created discount code.
Go to your store’s front end.
Choose the product and click on the “Add To Cart” button.
Go on the “cart page” and checkout page.
You’ve already applied the discount code created recently. That’s good.
After that, you can see the discount on the selected product.
Your discount code has been successfully created.
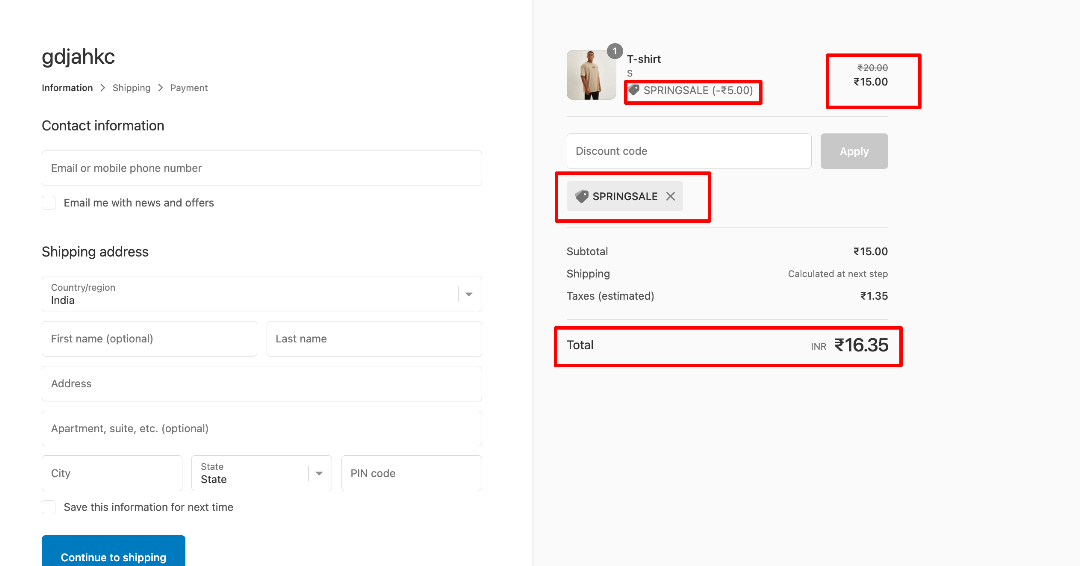
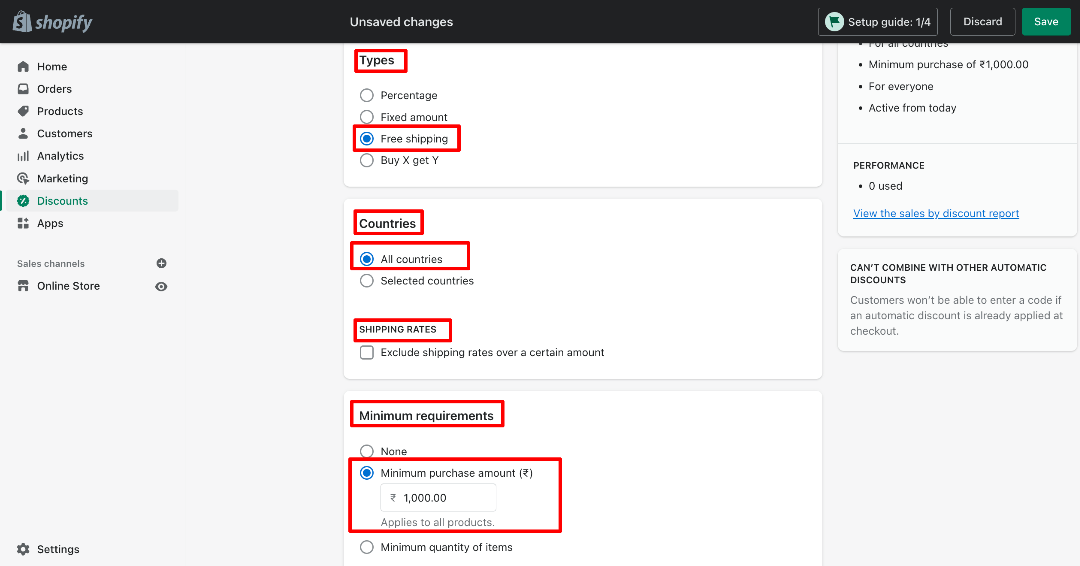
Let’s go on the 3rd discount type, which name is “Free Shipping”.
After that, You need to pick one option from countries. There are two options. One is all countries, and the second is selected countries. If you’re selecting the selected countries, then you can choose the country name names from the browse button.
Moreover, You have to set the minimum purchase amount or a minimum quantity of items. Pick one and enter it in the text box.
“Save” the Discount code.
Furthermore, As per first, we check in the front end. You can also check it by that process in the front end.
Let’s take a demo of the last discount type – Buy X Get X.
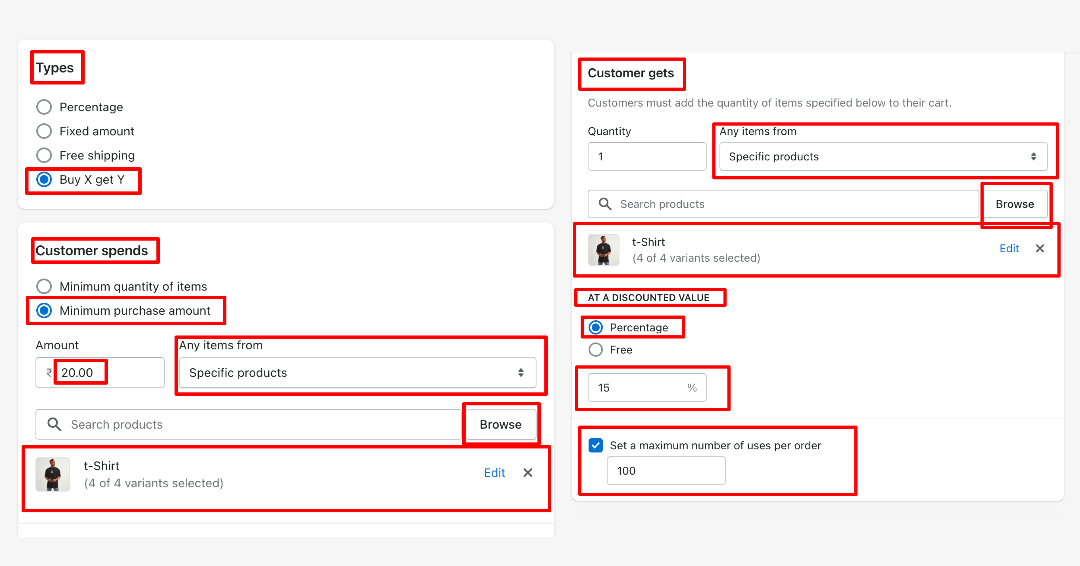
You require to fill the many sections.
First is customer spends – Pick one from the Minimum purchase amount or maximum quantity of items.
After that, fill the amount or Qty in the text box. You can see the “Any Items From” on the right side – it has a drop-down menu. You can select one from the menu and Browse the products Or Collections by clicking on the “Browse” button.
Moreover, You have to fill the “customer gets” section – In it, you need to specify the QTY and browse the products or collections.
Moving ahead to the last section – “At A Discount Value”,
You can Apply the discount using two ways – Percentage And Free.
If you’re selecting Percentage- You’ve to fill the Discount percentage value in the text box, and you can also set the maximum number of uses per order.
Fill the value in the text box.
Now you’re so smart. Click on the “Save” button.
After saving the discount code, Let’s test the discount code on the front end.
Select the products and add them to cart the product.
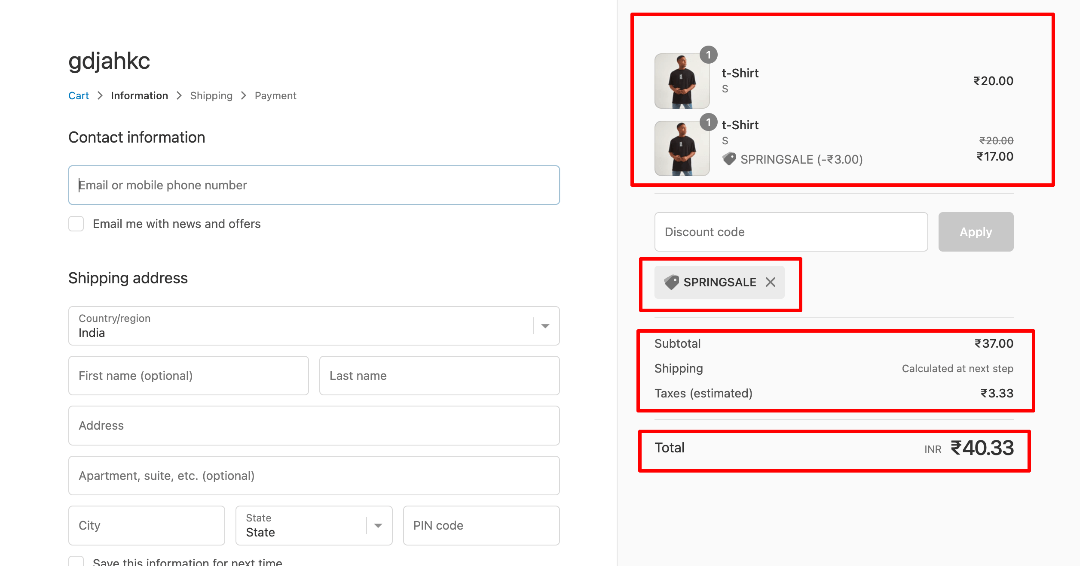
If you’re applying the recent discount code on a single product – It’ll not be applied.
Because the discount code is only applied on 2 or more products.
As an example, we’ve added 1 product with 2 qty, Applied the discount code – you can see the discount will be applied on the 2nd product.
You can compare the below image and the above image.
After finishing the discount type demo, two sections remain to fill.
These two are the same for every discount type.
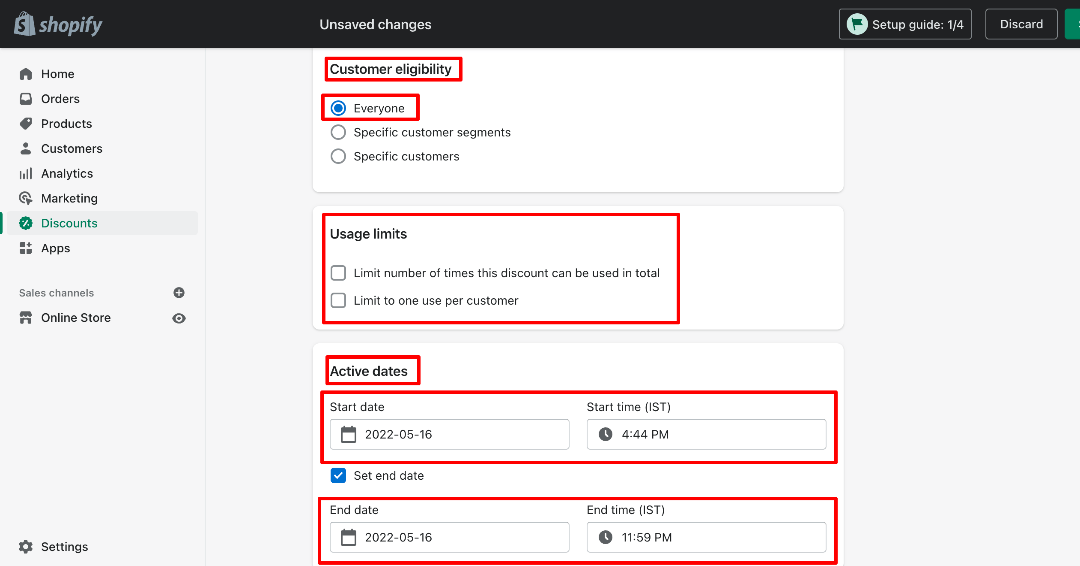
The first one is “Customer eligibility” – Pick one from that.
You can also set the usage limits as per your requirements.
The second one is “Active Dates”.
You can set the Discount code’s start & end date & time.
Then Save the discount code.
Oh, yes!!!
You have successfully learned how to create manual discount codes.
Now, click on discounts.
You’ll see the created discount codes.
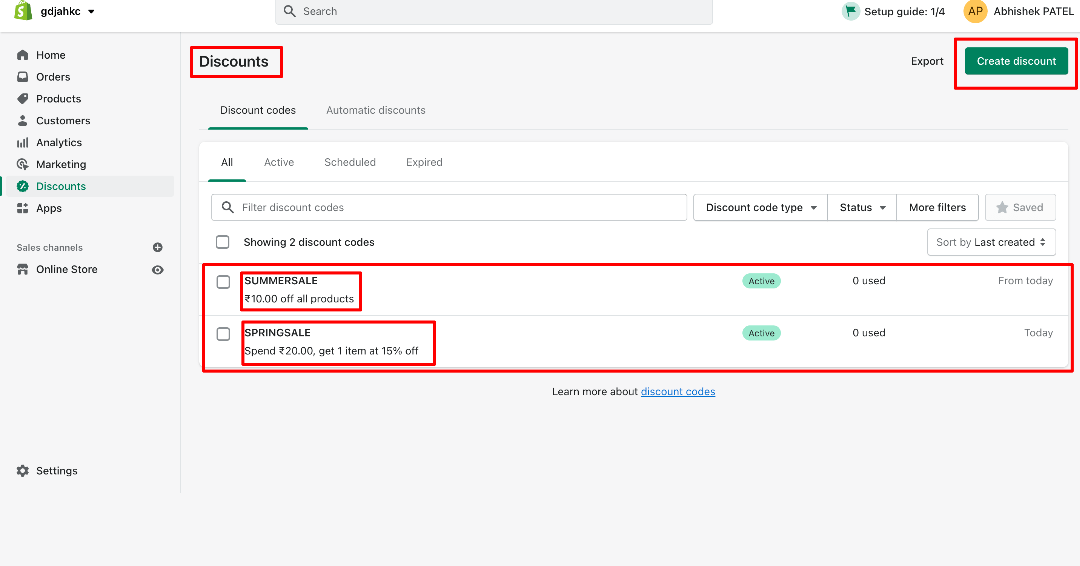
Now, we’ll go in the deep on the discounts.
There are two types of discount codes.
1. Manual Discounts
2. Automatic Discounts
You’ve learned already the first type.
We are now moving ahead on how to create automatic discounts.
Click on Automatic discounts
After that, click on Create Automatic Discount
You’ll be redirected to the Automatic discount creation page.
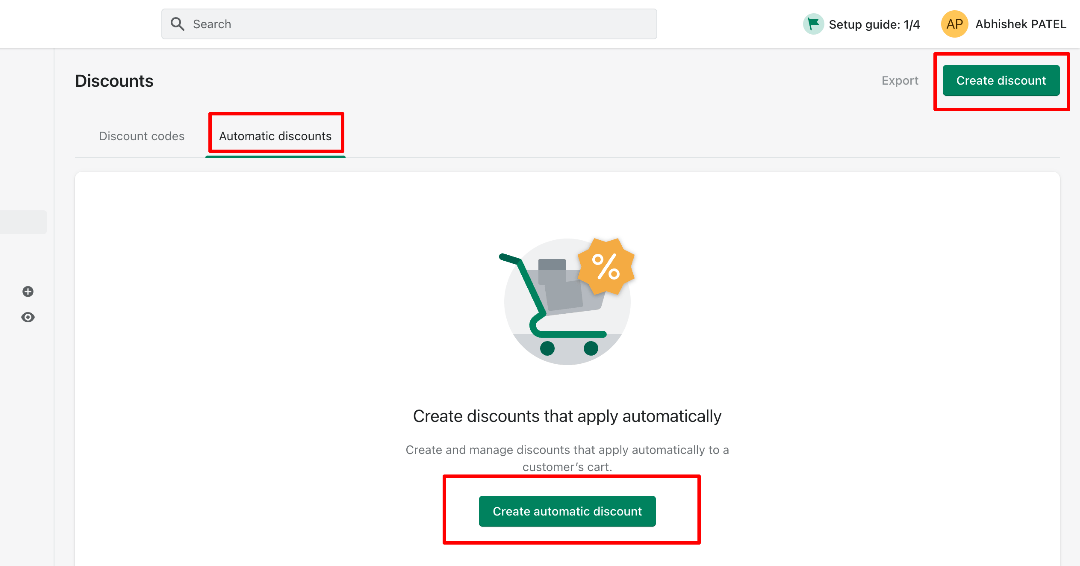
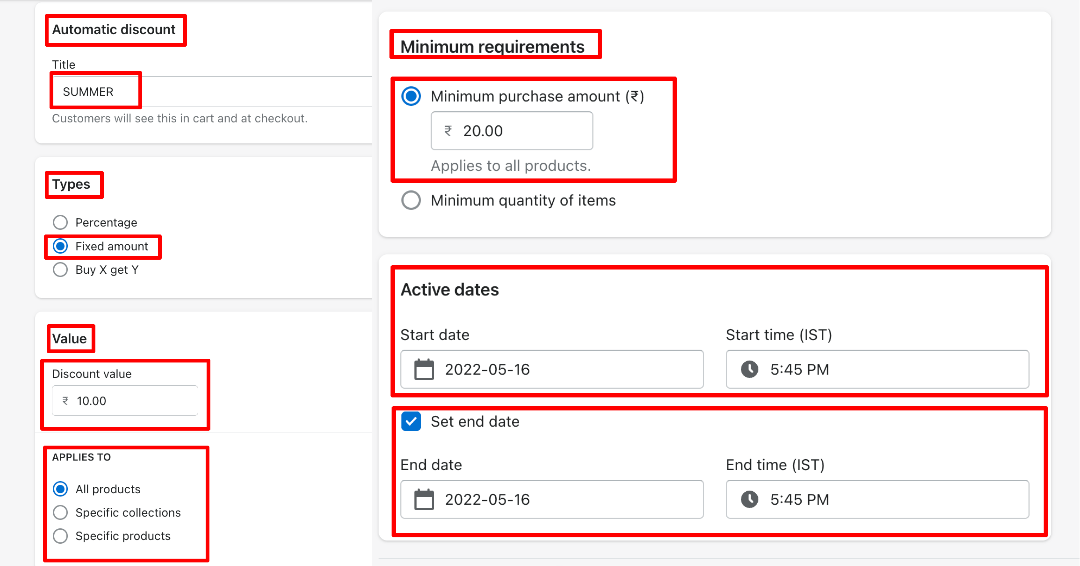
Please fill in the details which they need.
You require to fill in the title of the discount code.
Select the Types.
Fill the discount value in the text box.
Pick one – apply for specific products & collections or all products.
Pick one and fill the value on minimum requirements.
You can also set the discount start & end Date & time.
Save it.
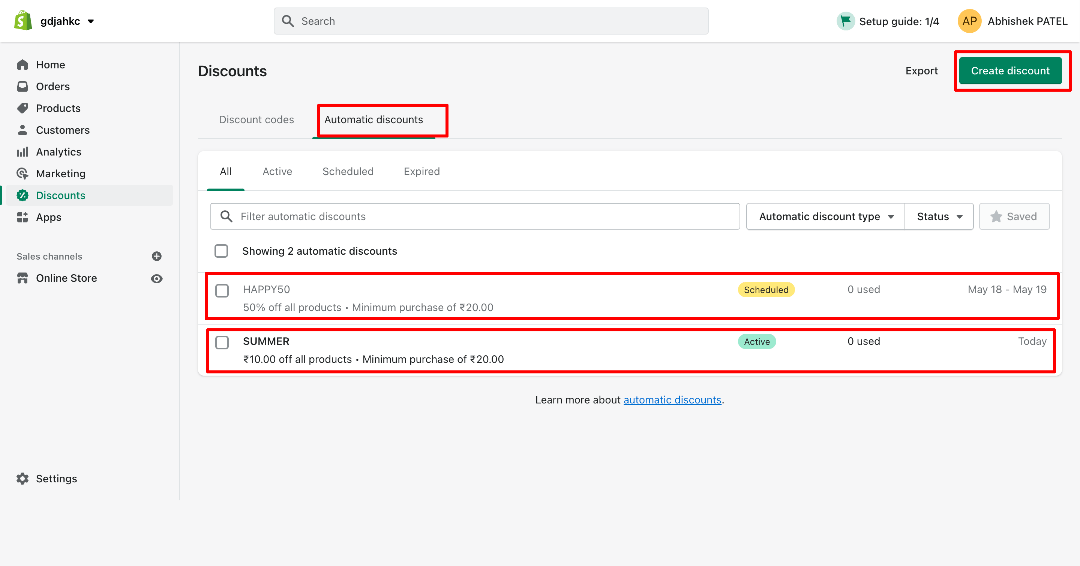
You can also create multiple automatic discount codes and display the list of created discount codes.
Conclusion
With the help of this blog, you should be able to create Shopify Discounts. Once you’re done, you can look at the Shopify theme customization to make your store more stunning and enhance the user’s shopping experience. Of course, the store with such product features also has a good hosting partner Like Shopify Cloud.
Born Techies –Digital Commerce agency offers Shopify, Shopware, Magento, and Bigcommerce development with the latest technologies.
Do you want to receive a free consultation about how to optimize your store and generate more sales? Reach us out at [email protected] or contact us, and we will be more than happy to help you out.

